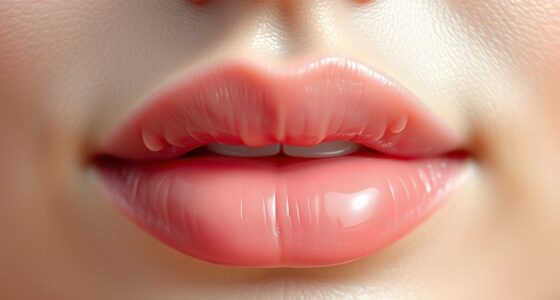
To effectively place patches, position them directly over active blemishes on your face. For pimples, apply them on spots like your chin, jawline, or cheeks where breakouts often occur. If aiming to reduce fine lines or wrinkles, place patches around your eyes, forehead, or mouth. Make sure your skin is clean and dry before applying, pressing gently to guarantee good adhesion. Want to learn more about how face mapping guides precise patch placement? Keep exploring for detailed insights.
Key Takeaways
- Place patches directly over active blemishes or pimples for targeted treatment and faster healing.
- Apply patches on the chin and jawline to address hormonal breakouts and related issues.
- Position patches around the forehead and cheeks to target expression lines or environmental acne.
- Ensure patches are on clean, dry skin for optimal adhesion and absorption of skincare ingredients.
- Use patches consistently overnight or for several hours to maximize their effectiveness on specific concern areas.

Have you ever wondered what your skin’s blemishes and breakouts reveal about your overall health? When you pay close attention to where your skin issues appear, you can better understand underlying concerns and target your skincare more effectively. Face mapping isn’t just about identifying problem areas; it’s about understanding what your skin’s messages mean. For instance, if you notice pimples popping up along your chin or jawline, it could indicate hormonal imbalances or stress. Knowing this helps you decide where to place patches for maximum benefit.
Pay attention to blemish locations to better understand your skin’s messages and improve your skincare routine.
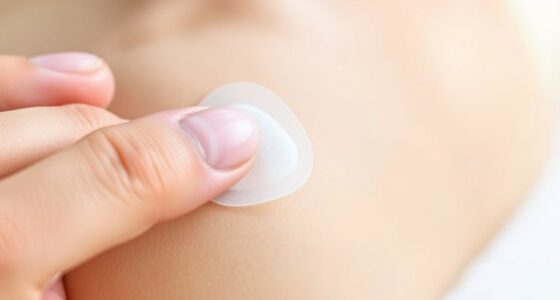
When it comes to acne patch placement, precision matters. You want to position these patches directly over active blemishes for the best results. Carefully peel and apply the patch to the affected area, ensuring it adheres well. This allows the patch to deliver targeted ingredients like salicylic acid or hydrocolloid directly into the pore, speeding up healing and reducing inflammation. Proper placement also prevents the spread of bacteria and minimizes scarring. Keep in mind that consistent use over several hours or overnight often yields the best outcomes, especially for stubborn spots.
Beyond treating acne, face mapping can guide your wrinkle relief strategies. If you notice fine lines around your eyes or mouth, applying wrinkle patches or targeted serums in those areas can improve skin elasticity and smoothness. Strategic patch placement around your forehead and cheeks can also help relax muscles that cause expression lines. When using patches for wrinkle relief, you should place them on clean, dry skin and press gently to ensure they stay put. Regular use combined with a good skincare routine can lead to visible improvements over time.
Paying attention to where you often see blemishes or signs of aging helps you tailor your skincare routine. If you observe breakouts on your cheeks, it might be worth exploring whether environmental factors or allergies are at play. When you know where to apply patches—whether to combat acne, reduce wrinkles, or soothe irritation—you empower yourself to target issues more precisely. This focused approach saves you time and money, and most importantly, enhances your skin’s health.
Ultimately, integrating face mapping into your skincare routine means listening to your skin’s signals and applying patches thoughtfully. Whether it’s for acne or aging concerns, proper placement ensures that each treatment works effectively. With consistency and attention to detail, you’ll see your skin become clearer, smoother, and more resilient, revealing a healthier, more radiant complexion. Recognizing skin health indicators can help you make more informed decisions about your skincare strategy.
Frequently Asked Questions
Can Patches Be Used Simultaneously on Different Facial Areas?
Yes, you can use patches simultaneously on different facial areas through multi-zone application. Just guarantee you avoid patch layering, which means placing patches too close together or on top of each other. This prevents irritation and allows each patch to work effectively. Be mindful of the recommended duration for each patch, and always follow the instructions for multi-zone application to maximize benefits and minimize any potential skin reactions.
How Long Should Patches Be Left on for Optimal Results?
Think of your skin as a garden; the ideal patch duration is like watering your plants just right. You should leave patches on for the recommended time, usually 15-20 minutes, to achieve the best results. Check the patch removal timing carefully—removing too soon or too late can lessen its effectiveness. Stick to the instructions for your specific patch to nurture your skin’s health and glow.
Are There Specific Patches for Sensitive or Acne-Prone Skin?
Yes, there are specific patches for sensitive or acne-prone skin. Look for hypoallergenic patches if your skin is sensitive, as they minimize irritation and are gentle on your skin. For acne-prone areas, use acne-specific patches that contain ingredients like salicylic acid or hydrocolloid to target breakouts effectively. Always choose patches suited to your skin type to avoid worsening irritation or acne.
Can Patch Placement Change Based on Skin Condition Severity?
Think of patch placement like adjusting a map based on terrain—severity matters. If your skin sensitivity or acne is mild, you can use smaller patches on specific areas; for more severe conditions, larger patches covering broader zones are better. This guarantees the patch size aligns with your skin’s needs, preventing irritation. Always monitor how your skin responds and adjust placement accordingly for ideal comfort and effectiveness.
Do Patches Work Better When Applied Before or After Skincare Routines?
You should apply patches after your skincare routine for better timing effectiveness. This allows your skin to fully absorb serums and moisturizers first, ensuring the patch’s active ingredients work more efficiently. If you apply patches before skincare layering, they might not adhere well or deliver ideal benefits. Waiting until after your skincare routine maximizes the patch’s effectiveness and ensures your skin benefits from both your products and the patch.
Conclusion
Now that you know where to place patches for common concerns, you’re armed with a simple, effective tool to tackle skin issues head-on. Remember, when it comes to skincare, timing and placement are key—think of it as hitting two birds with one stone. Stick to your routine, trust the process, and soon you’ll see those worries fade away. Don’t wait for trouble to knock; take action today and keep your skin looking its best!