
TL;DR

Get beauty and skincare favorites delivered free with Prime
- Fast, free delivery on millions of items
- Prime Video, Amazon Music and more included
- Member-only deals all year
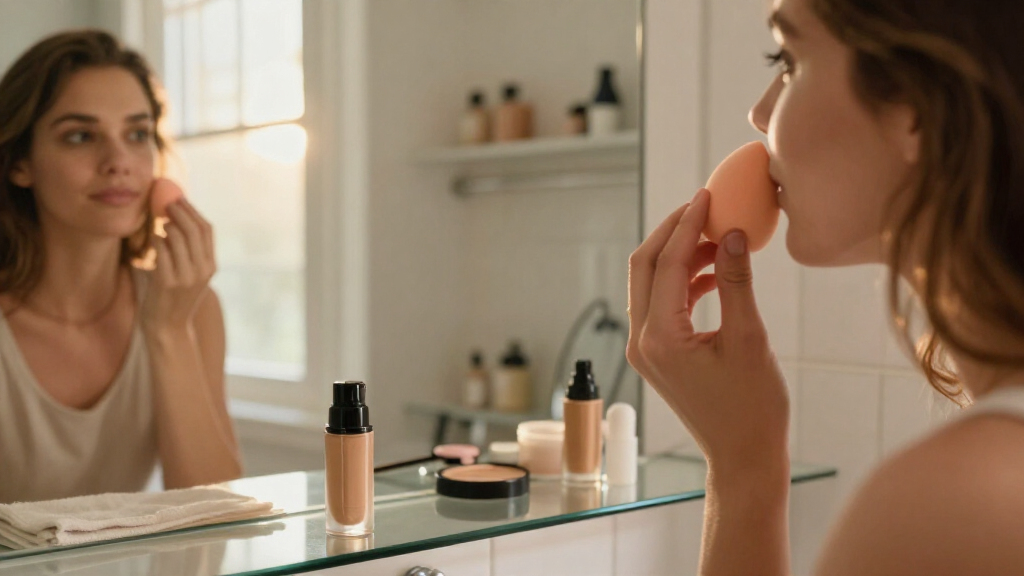
A Glamour UK guide featuring professional makeup artists describes how to apply liquid foundation with a slightly damp sponge. The method uses small amounts, tapping motions and gradual layers; artists say it can produce a softer, more blended finish, though results depend on the product and technique.
Glamour UK has published a step-by-step guide to applying foundation with a makeup sponge, drawing on advice from celebrity makeup artists Tim Quinn, Kasey Spickard and Christian Briceno. The technique centers on using a slightly damp sponge to press on thin layers of product and blend coverage, rather than rubbing foundation across the face.
Quinn recommends putting a few drops of foundation on the back of a hand first, which he says helps control how much product is used. The guide then advises picking up the foundation with a brush and dotting it across the centre of the face, where Quinn says many people want more coverage, before working outward. It recommends a liquid formula for use with a sponge.
For application, the guide says to wet the sponge, squeeze out excess water and press it into a clean towel so it is damp rather than saturated. Use the rounded end to tap or bounce foundation into the skin, adding product gradually where more coverage is wanted. Spickard recommends this stippling motion to blend without lifting too much coverage. The pointed end can reach around the nose and under the eyes.
Briceno advises using different amounts of foundation in different areas, rather than aiming for an even layer across the whole face. Quinn says remaining product on the sponge can be blended along the jawline and hairline. The guide suggests adding concealer where fuller coverage is needed, then setting with powder and setting spray. It also stresses starting with a clean sponge; it does not provide a cleaning schedule.
A Layered Route to Softer Coverage
The technique offers readers a practical way to control how much foundation they apply and where they apply it. Building coverage in thin, targeted layers may help avoid a uniformly heavy look, while tapping can soften the boundary between areas with more and less product. These are the artists’ professional recommendations, not a guarantee that a particular finish will last or suit every skin type.
The advice also clarifies that a sponge is a tool for blending, not a substitute for choosing the right formula or deciding how much coverage is wanted. The guide describes a sponge finish as more natural than full coverage, and Quinn cautions that a dry sponge can be used for more concentrated coverage but may not give the softer result he prefers. Readers can adjust the method to their desired finish and the product instructions.
Products Worth Considering
Withings Body Smart Wi-Fi and Bluetooth Smart Scale

Blueair Blue Pure 511i Max Air Purifier

Philips Sonicare 5950 Rechargeable Electric Toothbrush with 2 Brush Heads, Navy
As an affiliate, we earn on qualifying purchases.
The Artists’ Sponge Method
The article distinguishes a structured makeup sponge, beauty blender or powder puff from the thinner applicators sometimes included in makeup compacts. Quinn describes a sponge as a tool that can blend and soften foundation. Briceno says it lets him work in very thin layers, soften changes in coverage and lift excess product without disturbing the rest of the makeup.
For foundation, Quinn recommends a damp—not soaking wet—sponge. His preparation advice is to wet it, squeeze it out, then press it in a clean towel. The guide reports that the artists it consulted advised against using a dry sponge for a soft, even finish, while acknowledging Quinn’s view that a dry one can give more concentrated coverage. The practical distinction is about the finish the user wants, not a universal rule that one tool works best for everyone.
““What I particularly like about sponges is that they let me work with very thin layers, soften transitions between areas with more and less coverage, and gently lift excess product without disturbing the rest of the makeup.””
— Christian Briceno, celebrity makeup artist based in New York City
Results Depend on the Product
The guide presents artists’ techniques and preferences, not comparative testing of sponges, brushes or fingers. It does not establish that sponge application will last longer for every wearer, prevent cracking, or produce the same result across foundation formulas and skin types. Claims about a longer-wearing finish are attributed to the article’s explanation of the artists’ approach rather than to a reported study.
The supplied material also does not state the guide’s publication date, identify a specific sponge as necessary, or give detailed directions for cleaning one. It recommends starting with a clean sponge to help limit bacteria buildup, but readers are not given a cleaning frequency. The amount of coverage, choice of tool and final finish remain matters of personal preference.
Try the Technique in Layers
The guide offers a routine readers can try: dispense a small amount of liquid foundation onto the hand, dot it onto the centre of the face with a brush, then use a clean, damp sponge to tap and blend. Add more only where needed, using the pointed end for smaller areas, and finish with concealer or setting products if desired. The source does not announce a follow-up, product test or further development; the next step is for readers to adapt the method to their own products and preferred coverage.
Key Questions
Should a foundation sponge be wet or dry?
The guide recommends a slightly damp sponge. Wet it and squeeze out excess water, then press it in a clean towel. Quinn says a dry sponge can give more concentrated coverage, but may not create the softer finish he associates with a damp one.
How should foundation be applied with a sponge?
Put a small amount on the back of your hand, dot it onto the face and use the sponge’s rounded end to tap or bounce the product into the skin. Build coverage gradually rather than applying a heavy layer everywhere.
Which part of the sponge should I use around the nose and eyes?
Quinn recommends the pointed end for reaching around the nose and under the eyes. Use whatever product remains on the sponge to blend toward the jawline and hairline.
Does using a sponge guarantee longer-lasting foundation?
No such guarantee is established in the guide. The artists describe thin layers and blending as useful techniques, but the source does not report comparative testing or confirm that sponge application lasts longer for everyone.
Why should the sponge be clean?
The guide says to start with a clean sponge to help prevent bacteria buildup that can contribute to breakouts. It does not specify how often to wash the sponge.
Source: glamourmagazine.co.uk