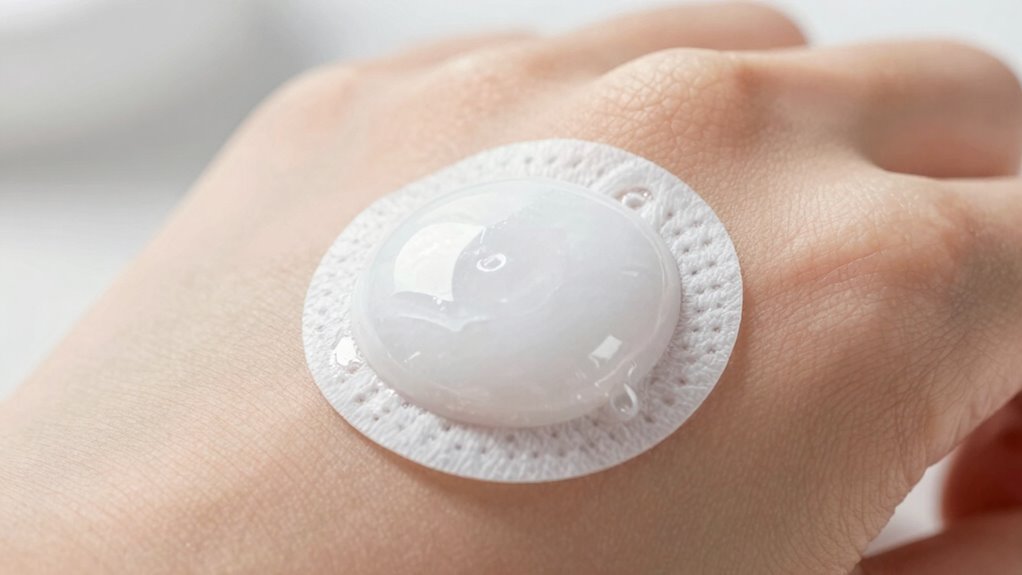
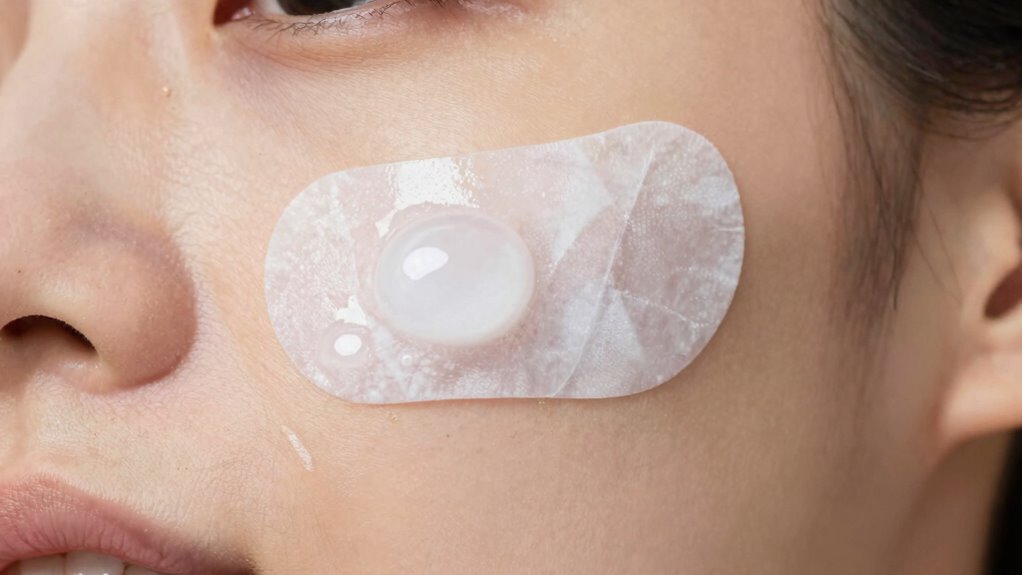
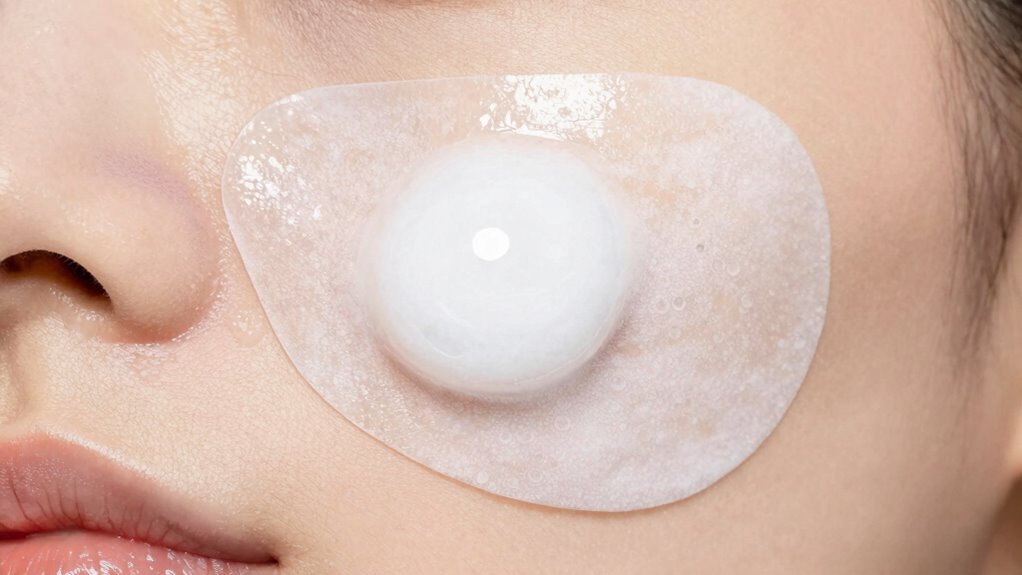
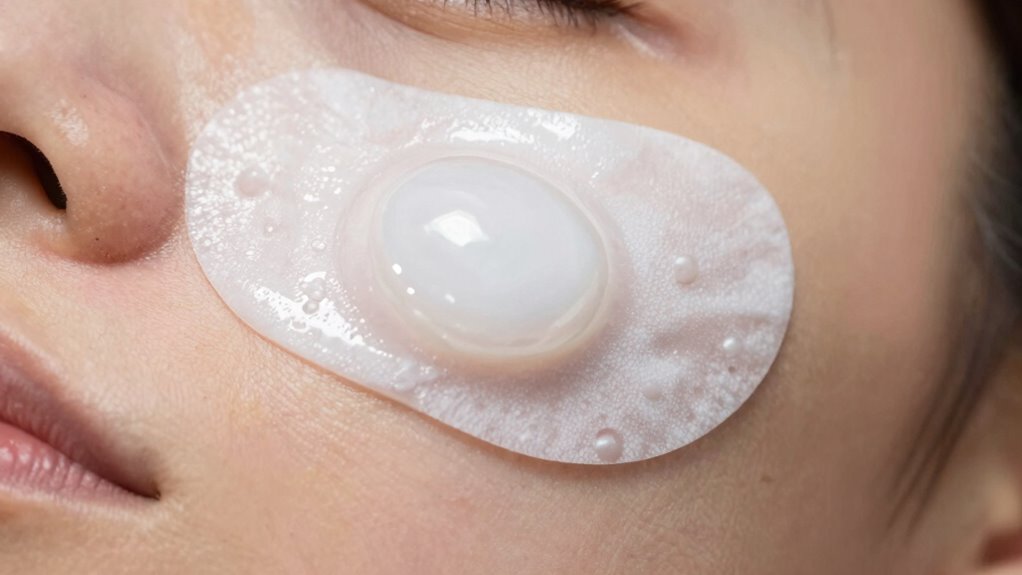
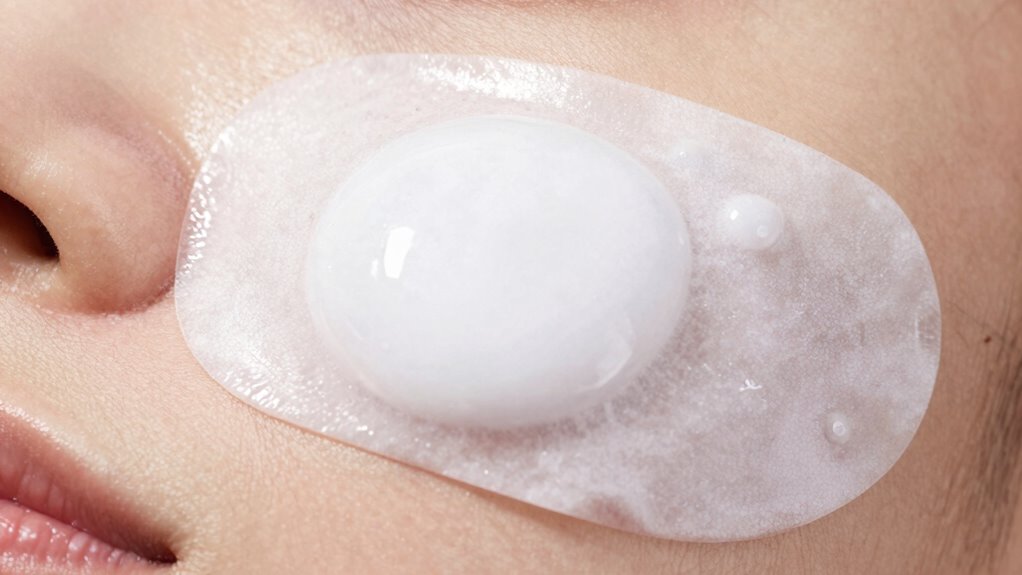
When you see a white bubble form inside your hydrocolloid patch, it signals that the patch is actively absorbing fluids and impurities from your skin, promoting healing. This bubble indicates effective function but also means it’s time to replace the patch to prevent infection or irritation. Not all patches develop a visible bubble, and various factors influence its appearance. Knowing what the white bubble signals helps you use your patches correctly—more useful tips follow to ensure safe, ideal healing.
Key Takeaways
- The white bubble forms as hydrocolloid patches absorb fluids and pus from the skin, indicating active impurity extraction.
- It signals that the patch is effectively promoting healing by maintaining a moist environment and absorbing exudate.
- The bubble’s appearance varies based on the patch’s material and the amount of skin fluid involved.
- Replacing the patch when the white bubble appears helps prevent infection and supports continuous healing.
- The white bubble is a normal sign of the patch’s functionality, not a defect or problem.
What Are Hydrocolloid Patches and How Do They Work?
Have you ever wondered how hydrocolloid patches work to heal your skin? These patches create an ideal environment by maintaining skin hydration, which promotes faster healing. They absorb excess fluids from the wound, drawing out impurities and reducing swelling. By keeping the area moist, they help prevent the formation of scabs, leading to less scarring. Additionally, the moist environment inhibits bacterial growth, lowering the risk of infection. The hydrocolloid material acts like a barrier, protecting your skin from dirt and bacteria while allowing oxygen to pass through. This combination of moisture retention and bacterial control accelerates healing and keeps your skin healthier. Proper use of hydrocolloid patches, including application techniques, ensures optimal results and minimizes potential skin irritation. Moreover, the moist wound environment is essential in reducing healing time and improving overall skin regeneration. Understanding the science behind hydrocolloid technology can help you select the right patches for your skin concerns and optimize healing outcomes. Additionally, advances in material science have led to the development of more effective and comfortable hydrocolloid dressings for various skin types.
How Does the White Bubble Form Inside the Patch?

Ever wondered what causes the white bubble to form inside a hydrocolloid patch? It happens when your skin’s fluids and pus seep into the patch as it works to absorb impurities. The hydrocolloid material reacts by drawing out moisture from your pimple, creating a gel-like substance that accumulates inside, forming the white bubble. This process is a sign that the patch is effectively doing its job, aiding in pimple prevention by reducing inflammation and preventing bacteria from entering your skin. Incorporating hydrocolloid patches into your skincare routines can help manage breakouts more efficiently. The white bubble isn’t a flaw—it’s a visual indicator that your skin is healing and that the patch is actively extracting impurities to support clearer skin. Understanding material properties in hydrocolloid patches helps explain how the patch’s materials maintain their integrity during this process.
What Does the White Bubble Mean for Your Skin?
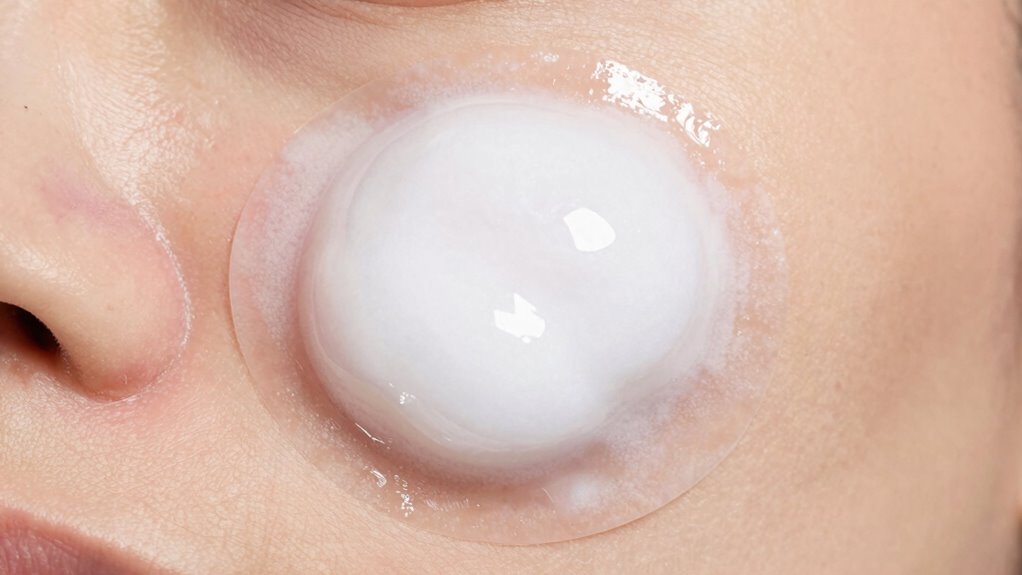
The white bubble inside a hydrocolloid patch signals that your skin is actively healing. It indicates that the patch is absorbing excess fluid, which helps maintain skin hydration and supports faster recovery. This process of exudate absorption is essential for optimal healing conditions. The bubble also reflects the patch’s durability; a well-formed bubble means it’s effectively containing wound exudate without breaking apart. Here’s a quick look at what it signifies:
| Effect on Skin | Implication for Patch Durability |
|---|---|
| Keeps skin hydrated | Shows the patch is functioning properly |
| Promotes healing | Indicates the patch remains intact |
| Reduces irritation | Ensures consistent protection |
Seeing the white bubble is a good sign—your skin is healing, and your patch is doing its job efficiently. Additionally, understanding the exudate absorption process can help you better assess patch performance. Recognizing the importance of moist wound healing can further improve your care approach. For example, understanding how wound exudate interacts with the patch can provide insights into the healing process and help optimize treatment. Moreover, the presence of the bubble confirms that the patch maintains a moist environment, which is crucial for effective healing.
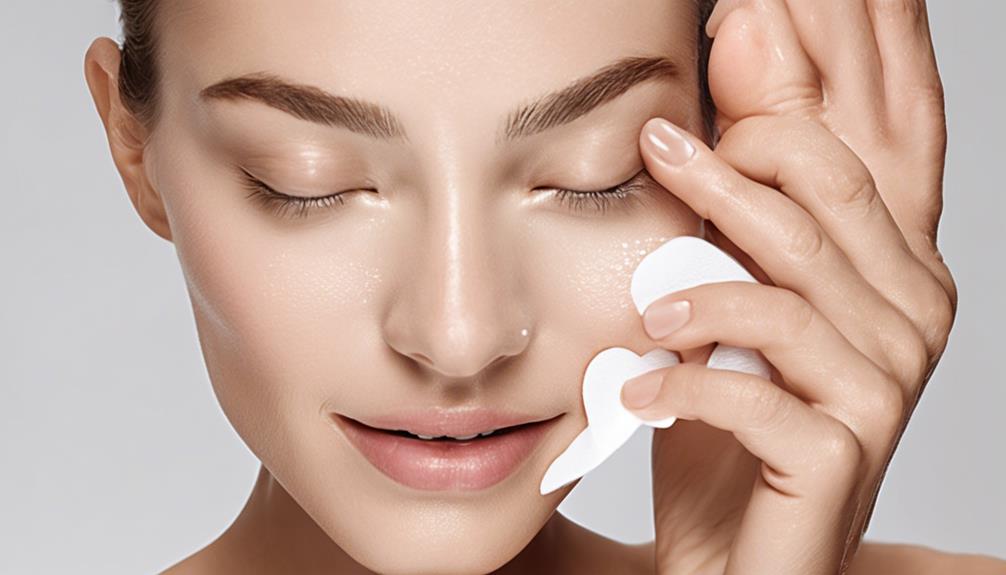
How Do You Properly Apply and Remove Hydrocolloid Patches?
To get the best results, you need to know how to properly apply your hydrocolloid patch, ensuring it sticks well and covers the blemish completely. When removing it, do so gently to avoid irritating your skin or damaging the healing process. We’ll walk through the right techniques for both applying and taking off these patches effectively. Additionally, understanding piercing care and hygiene can help you keep your skincare tools clean and in good condition. Proper storage and handling of your patches can also extend their effectiveness and hygiene practices, helping you maintain healthy skin and prevent infections. Incorporating natural skincare routines can further support skin healing and overall health.
Proper Application Technique
Applying hydrocolloid patches correctly guarantees they work effectively and stay in place. Start by cleaning and drying your skin thoroughly to guarantee optimal patch durability and skin compatibility. Choose a patch slightly larger than your blemish for better adhesion. Press firmly around the edges to eliminate air bubbles, which can compromise performance. Avoid touching the sticky side excessively. If needed, gently smooth out the patch to secure it. When removing, do so carefully to prevent skin irritation. Proper application minimizes the chance of the patch peeling prematurely, maintaining its effectiveness. Here’s a quick overview:
| Step | Tip |
|---|---|
| Clean and dry skin | Ensures better patch adhesion and skin safety |
| Correct size selection | Prevents unnecessary patch lifting |
| Firm pressure | Improves durability and longevity |
| Avoid touch | Reduces contamination and skin irritation |
| Gentle removal | Protects skin during removal |
Maintaining proper technique is essential to maximize effectiveness and prevent skin damage. Using a clean application process can further enhance the overall results and prevent infections. Additionally, ensuring your environment is free from dust and bacteria can help keep the area sterile and promote healing, supporting the proper healing process. Incorporating proper hygiene practices can also reduce the risk of bacterial transfer and improve healing outcomes.
Effective Removal Methods
Removing hydrocolloid patches properly is essential to protect your skin and guarantee their continued effectiveness. To do so, gently peel the edges away, starting from one side, and avoid pulling abruptly, which can damage your skin. Follow these steps to optimize skin healing and maximize the benefits of hydrocolloid science:
- Use warm water or oil to loosen the patch if it sticks too tightly.
- Peel slowly to minimize skin irritation and prevent tearing.
- Pat the area dry gently after removal to avoid unnecessary trauma.
- Avoid ripping or pulling the patch off, as this can cause skin damage and delay healing.
- Incorporate gentle techniques to prevent disrupting the skin surface and promote ongoing recovery.
- Be aware that improper removal can sometimes trigger narcissistic reactions, especially if the skin or appearance is seen as threatened or criticized, so handling with care is crucial.
- Remember that proper removal methods not only protect your skin but also maintain the effectiveness of the hydrocolloid material over time.
- Using appropriate techniques ensures that the skin remains healthy and that the patch continues to provide optimal healing conditions.
- Understanding the material properties of hydrocolloid patches can help you choose the best removal approach for your skin type.
Proper removal preserves skin integrity, supports ongoing skin healing, and ensures you get the most out of your hydrocolloid patches.
When Should You Replace the Patch After White Bubble Formation?
When you notice a white bubble forming under your hydrocolloid patch, it’s a clear sign that it’s time to replace it. This usually happens when the patch has absorbed enough fluid from a pimple, indicating it’s done its job. For effective pimple treatment, you should change the patch promptly to prevent bacteria buildup and maintain your skincare routine’s effectiveness. Waiting too long can cause the white bubble to become larger or rupture, risking infection or scarring. Typically, you should replace the patch within 8 to 12 hours after white bubble formation. Consistently changing your patch ensures maximum absorption and helps keep your skin clean and healthy. Always monitor your skin’s response and follow recommended usage guidelines for the best results.
Do All Hydrocolloid Patches Make a White Bubble? What Are the Variations?
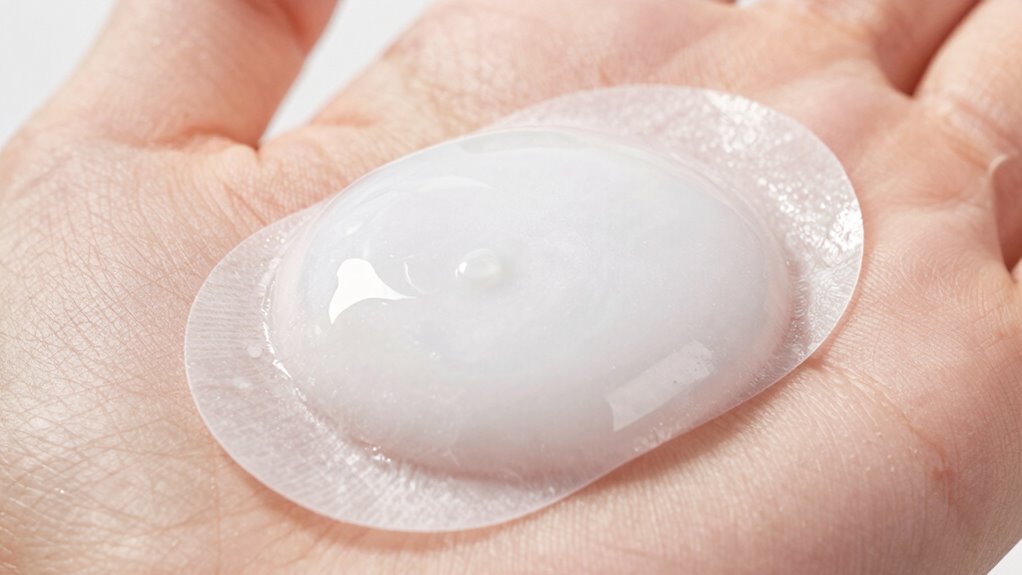
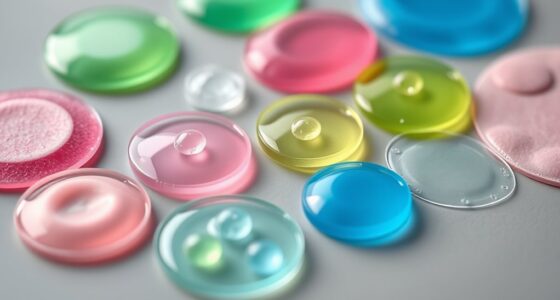
Not all hydrocolloid patches produce a white bubble, as their appearance can vary depending on the product and the condition of your skin. The bubble formation process depends on factors like the type of hydrocolloid materials used and how much fluid your skin excretes. Some patches are designed to minimize visible bubbles, while others naturally develop a white bubble during absorption. Variations include differences in thickness, adhesion, and material composition, affecting how the bubble looks and forms. You might notice some patches create a prominent white bubble, while others stay mostly clear. It’s important to recognize that these differences are normal and relate to the specific design and formulation of each product. Understanding these variations helps you choose the right patch for your skin and needs.
Tips to Get the Most From Your Hydrocolloid Patches
To get the most from your hydrocolloid patches, it’s important to prepare your skin properly before application. Start by gently cleansing your face to remove dirt and excess oil, which helps the patch adhere better. Pat your skin dry and consider applying a light moisturizer to maintain skin hydration, making the patch more effective. If you’re targeting a pimple, avoid picking or squeezing, as this can hinder pimple healing. When applying the patch, ensure it fully covers the blemish and adheres smoothly, avoiding air bubbles. Keep the patch on for the recommended time, usually 6-8 hours or overnight. Proper preparation maximizes absorption of impurities, speeds up pimple healing, and keeps your skin hydrated and healthy.
Are There Any Risks or Side Effects of White Bubble Formation?
White bubbles under your hydrocolloid patch can sometimes indicate skin reactions or improper application. If you notice persistent bubbles or discomfort, it’s important to check your skin’s response and guarantee you’re applying the patch correctly. Seek medical advice if you experience severe irritation or if the bubbles don’t resolve quickly.
Possible Skin Reactions
While hydrocolloid patches are generally safe, some users notice white bubbles forming during use, which can raise concerns about potential skin reactions. These bubbles might cause worries about skin irritation or allergic reactions, especially if your skin is sensitive. It’s important to monitor how your skin responds and remove the patch if you experience discomfort. Common reactions include redness, itching, or swelling. You may also develop more serious allergic reactions like rash or blistering. To minimize risks, avoid using patches on broken or inflamed skin. Always do a patch test if you’re new to hydrocolloid patches. If you notice persistent irritation or allergic signs, consult a dermatologist for guidance. Your skin’s reaction depends on individual sensitivities and the patch’s ingredients.
Proper Patch Application
Proper application of hydrocolloid patches can help reduce the likelihood of white bubble formation and associated risks. Before applying the patch, verify your skin is thoroughly cleansed to remove excess oil, dirt, and debris. This pore cleansing step helps the patch adhere properly and minimizes trapped air that can cause bubbles. Avoid using patches on skin with ingredient sensitivity or irritation, as this can increase the chance of adverse reactions or white bubbles. Make sure the patch is smooth and free of wrinkles during application, pressing gently to eliminate air pockets. If a white bubble appears, it may indicate trapped air or product buildup. Properly cleansing, selecting suitable patches, and applying with care can help you avoid these issues and promote effective healing.
When to Seek Help
If you notice persistent or worsening white bubbles after applying a hydrocolloid patch, it’s important to seek help. White bubbles can sometimes indicate skin irritation or issues with patch durability, which might lead to further complications. Ignoring these signs can worsen your skin’s condition or cause discomfort. Be alert if you experience increased redness, swelling, or pain around the area. Also, if the bubbles don’t resolve quickly or if the patch starts to peel prematurely, consult a healthcare professional. Proper evaluation guarantees you aren’t risking an allergic reaction or skin damage. Remember, timely intervention can prevent complications and ensure safe healing. Always prioritize your skin’s health when you notice unusual reactions like persistent white bubbles.
Frequently Asked Questions
Can White Bubbles Indicate Skin Irritation or Allergy?
White bubbles on hydrocolloid patches can indicate skin sensitivity or an allergic reaction. If your skin reacts to the patch, you might see these bubbles form, signaling irritation or an allergy. It’s important to remove the patch promptly and observe your skin. If you notice persistent redness, swelling, or discomfort, you should consult a dermatologist. Always patch test new products to minimize the risk of allergic reactions and skin irritation.
Do Different Brands of Patches Produce Different Bubble Appearances?
Yes, different brands of patches can produce varying bubble appearances. Brand variations influence bubble consistency due to differences in material quality and formulation. Some patches may create larger, more prominent bubbles, while others form smaller or fewer bubbles. These differences are normal and can depend on how the patch interacts with your skin, the coverage area, and application technique. Always follow the instructions for the best results with each brand.
Is It Safe to Pop the White Bubble Inside the Patch?
Like in a sci-fi flick, you might wonder if popping the white bubble inside your patch is safe. It’s generally not, as popping risks infection or skin irritation. Instead, consider alternative remedies like cleaning the area gently or applying a warm compress. If the bubble’s bothering you, consult skincare experts. Trust your instincts—sometimes, leaving it alone is the best way to promote healing and avoid unnecessary risks.
How Long Does the White Bubble Typically Stay Before Removal?
The white bubble inside your hydrocolloid patch usually stays for about 24 to 48 hours before removal. You should monitor it closely and remove the patch once the bubble becomes large, cloudy, or starts to lift, as this indicates it has absorbed enough exudate. Don’t wait too long, as extended use can lead to skin irritation. Following this duration timeframe guarantees ideal healing and skin safety.
Do White Bubbles Affect the Patch’s Healing Effectiveness?
Did you know that bubble formation can reduce a patch’s adhesion by up to 20%? White bubbles don’t harm healing directly but can affect the patch’s effectiveness by causing uneven contact with your skin. This might slow down absorption of healing agents. To guarantee ideal results, press the patch gently to remove bubbles and secure proper adhesion, which helps maximize healing and prevents the formation of additional bubbles.
Conclusion
Now that you know what causes the mysterious white bubble, you can confidently use your hydrocolloid patches like a skincare superhero. Remember, this tiny bubble is just your skin’s way of fighting back against blemishes—nothing to fear! With proper application and care, you’ll banish pimples faster than you can say “miracle,” turning your skin into a flawless canvas. Stay vigilant, and let these patches work their magic—your skin’s ultimate secret weapon!